Thursday, March 10, 2011

Orangery redo – Part I


Hello my friends! I am in the middle of moving furniture all around the house, because next week the painters will arrive to repaint our orangery! I wrote about our orangery in an earlier post HERE. We really enjoy sitting in this place, gathering around the fire place with family and friends! It is almost 4 years ago since we moved in our home and some places, as the orangery, really need to be repainted. When we moved in, we painted the walls of the orangery in a flat grey color but I am done with it at this moment! I really wanted something new…! Jan and me have decided to paint the walls in a lime wash painting.


Here are two pictures of how the orangery actually looks like.

foto's 026Photo credit : Jo Pauwels for Beta-Plus publishing

foto's 027Photo credit : Fotografie Claude Smekens


The passed weekends, I was browsing through my collection of BETA-PLUS books to find some inspiration for this orangery redo.

foto's 005

Mainly in these 3 titles of the Beta-Plus publications I found the most suitable images to explain the painters what I really wanted the walls have to look like :

COMPENDIUM COLOUR & TEXTURE  (to see a preview click HERE)

CONTEMPORARY LVING WITH ANTIQUES (to see a preview click HERE)

LIVING WITH COLOUR

foto's 007

To choose the exact paint color, we have to take a few elements into consideration :

The lime paint has to match the color of the oak roof construction,

foto's 015

has to match the brick stone floor,

foto's 013


and has to go with the black colored steel windows.

foto's 038

foto's 002 I definitely want to use again linen fabrics for the window treatment and the sofa upholstery.


foto's 008

Actually I love the earthy color of these antique chinese vases in my kitchen and…

foto's 009

… the sandy color of this antique Syrian vase.

foto's 006

Believe it or not, this will be the basic point to determine the exact lime wash paint for the orangery walls!

foto's 010

This sample of the Belgian Libeco linen is beautiful!!!! A mix of earthy and beige tones!

Wonderful together with these lime wash paint tones! Isn’t it!

Lime wash paint 2

Lime wash paint 1

Our painter promised me to mix and match the color of the lime wash paint, during the application next week, untill he will become the exact, required color!! Great isn’t it? So,that gives us the possibility to even change the color if we don’t like it!

foto's 040 The chosen color needs to have tones which are present in the pointing of the floor bricks,

foto's 041 and which are seen in the oak ceiling beams,

foto's 039 and seen on the chimney piece of the orangery!!!


Because the orangery is in connection with our kitchen, as you can see on the picture here below, chosen fabrics and painting have to go well with the kitchen color palette.

foto's 029Photo credit : Fotografie Claude Smekens

I have chosen for this Libeco linen sofa upholstery, that is for sure!

foto's 004


We decided to not change the window treatment fabric because it has to match the black steel windows.

foto's 016

The slipcover of the existing 2-seats sofa will be changed into the chosen Libeco linen color as shown above.

foto's 028 Photo credit : Fotografie Claude Smekens

On the other side, in front of the 2 windows, I have chosen for a new large, straight sofa (upholstery in the same fabric as the 2-seat sofa).

I can’t show you a picture of it, because it doesn’t exist yet! The sofa will be new-made for us! But it will look a bit as the sofa on the image here below.

foto's 025

Here are a few inspirational pictures about the color palette and furniture I love to see in the orangery.

foto's 036image source : Alexandra Siebelink

foto's 042 image source : Axel Vervoordt

foto's 032 image source : Axel Vervoordt

I love the combination of a large coffee table in front of a large straight sofa!

foto's 011

I will tell you more about the choice of furniture and decorative items in a later post about the orangery-redo!


foto's 037

I do hope that our dog Ralph will love the new look because the orangery is also his bedroom at night!

Talk to you soon!

xx

Signature

The French greige

Det är härligt att låta sig inspireras av utländska hem, det blir annars så likriktat svenskt allting. Det här huset i Provence i södra Frankrike och har den franska ganska typiska ljusa greige putsen både på väggar och golv som matchar perfekt med deras klassiska stenväggar. Att inredningen sen går i vitt, naturfärg och trä gör att det blir ett väldigt jordnära och harmoniskt intryck. Kul att de blandat ruffa trämöbler med moderna lite mer 'snygga'. Om du undrar hur man ska kunna anamma det här i ett skandinaviskt hem, kika på dagens inlägg hos Linda.

Take a look at this house in Provence in south of France. I like the earth to ground colour scheme with the greige on both floor and walls, and also how they have mixed rough wooden furniture with a more modern neat style. It works really great and it looks calm and harmonic. Take a look at Living like Lindas post today, these walls in a more modern and scandinavian house.

Photo from photographer Nicolas Mathéus

Wednesday, March 9, 2011

Make Your Own Lampshades

by: Dean Novosat

When redecorating your room, you may be faced with looking for new lampshades (or perhaps a lampshade you currently have has gotten damaged). So why not make your own!

If your lamp currently has a lampshade on it, half of the battle is already won! You have a base to start building your new shade. When selecting a material for your new shade, you can use paper, fabrics, plastic, or any heat-resistant material. Do keep in mind though, that the surface of a 100-watt light bulb can reach over 200 degrees and could cause a fire hazard. Make sure the material you choose for a lampshade is either far enough from the light bulb, or is fire-resistant.

Next, have fun! Take a trip to your local craft store or fabric store and get some ideas for your fabric or other material for your shade. Remember, the more transparent the material, the more the color of your light will change by the material. If you use a lightweight, transparent green sheer material, your finished lamp will give off a greenish glow. On the other hand, a heavy piece of velvet (or how about some thin strips of tree bark) won’t allow much light through at all. Light will escape from the top or bottom of the lamp only. Keep this in mind as you plan your new lampshade.

To begin making your new lampshade, you will need the measurements of the current shade. If possible, take the old shade apart by carefully cutting it along it’s seams. You can then use this as a template for your new lampshade. However, don’t be stifled by the old shade! You can easily create an entirely new look with a piece of rigid wire, bending it into a new shape for a new shade. In this case, making a new cover may be a little trickier, but the process is the same. Simply cover the lampshade frame with your material. For fabric you can sew the seams or glue it. The same is true for other materials. If the glue is far enough away from the light bulb, you can even use hot melt glue.

The best part of making your own lampshades is that if you don’t like your creation, or you redecorate your room, you can quickly and inexpensively make a new lampshade.

About The Author

Dean Novosat holds a degree in Scenery and Lighting Design from Frankling & Marshall College and he uses his knowledge and experience with theatrical lighting in the home. He feels the home is just a blank canvas or stage that we choose to live in! He is the webmaster of http://www.only-lamp-shades.com and he enjoys using light in unique and different ways in the home.

Improving your home and your life only at Home Improvement Idea : http://home-improvement-idea.blogspot.com

Home Decorators Collection

Home Decorators Collection

Home Decorators Collection Home Companion magazine features
Taylor Bar Table, Home Decorators Collection Furniture
Find Living Room and other furniture at Home Decorators Collection
Home Decorators Collection offers a diverse range
Home Decorators Collection features merchandise
Home Decorators Collection She writes, I was recently looking around the Home Decorator's Collection

DIY Home Decor

Home Decorators Collection

Vårinspiration från Åhléns

Wow, 492 som följer bloggen via bloglovin, det är så kul att se hur det går, i och för sig väldigt sakta men, uppåt. Du vet väl att om du följer min blogg via bloglovin så har du möjlighet att få ett mail varje gång jag gör något nytt inlägg.

Åhléns skickade ut nya inspirerande vårbilder för någon vecka sen. Så här ser de ut.

New spring inspiration from Åhléns.

Pressbilder

Tuesday, March 8, 2011

Kitchen island lighting fixtures

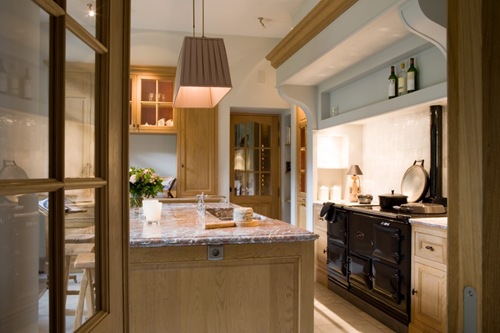
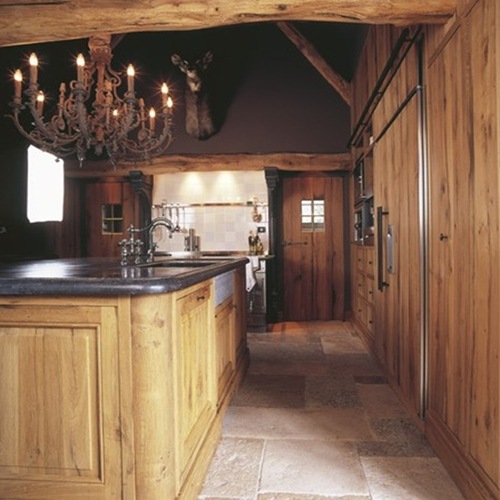
Choosing the most suitable lighting fixture for your kitchen island isn’t always that evident. There is a lot of choice of different kinds of fixtures, as lanterns, glass and shades pendants, industrial pendants, chandeliers. Passed weekend I was searching for an island fixture to hang above the kitchen island of one of my clients and I realized that there are quite a lot of possibilities to add the most beautiful lighting into your kitchen. Depending of course of the design style of your kitchen. Either you have a rustic or industrial styled kitchen, a contemporary or a more traditional styled kitchen, you will always find that fixture that fits your style.

I posted some images of kitchen island fixtures to inspire you to make your best choice.

Enjoy!

Lanterns

33Image source Erin Martin

I love lanterns, whether they are antique pieces or new made.

19 Image source Bates Corkern

37 Image source Cote de Texas

Love this antique beauty in the above image!!

18 Sorry don’t know the image source.

17 Sorry don’t know the image source.

Pendants

28 Image source Thomas Hamel Design

30 Image source Jennifer Worts

Industrial lighting

7 Image source Cote de Texas

24 Image source Massucco Warner Miller

Nautic fixtures

10Image source Kvänum

More pendants

13 Image source Inspiring Interiors

20 Image source 1st option

15 Image source Plain English

14 Sorry don’t know the image source.

8Image source Benecki Fine Homes

4 Image source NH Design

35 Image source My Notting Hill

6 Image source Inspiring Interiors

29 Image source Decota

36 Sorry don’t know the image source.

1 Image source Lefèvre Interiors

Chandeliers

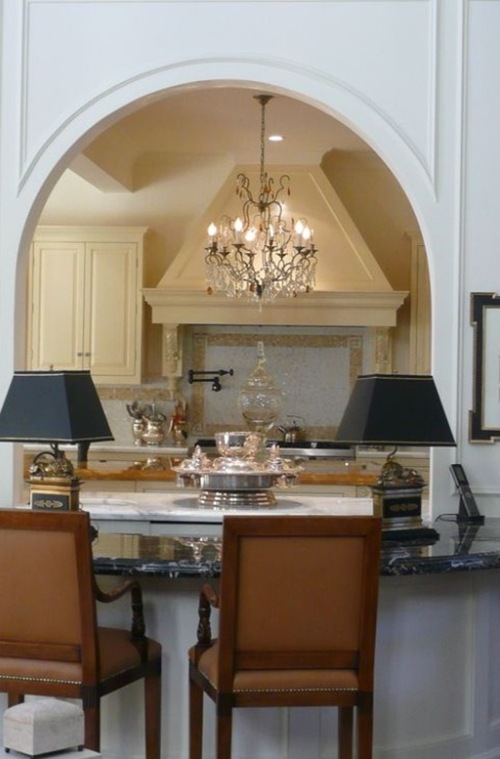
Chandeliers are definitely my favorite kitchen island lighting fixtures at this moment!

2 Image source Côté Maison photocredit Patrick Van Robaeys (cuisine de AM Projects)

Gorgeous chandeliers and I love to see them hanging in pair!

3 Image source Côté Maison photocredit Patrick Van Robaeys (cuisine de AM Projects)

25 Sorry don’t know the image source.

26 Sorry don’t know the image source.

Love this iron chandelier hung in a mountain house!

9Image source Inspiring Interiors

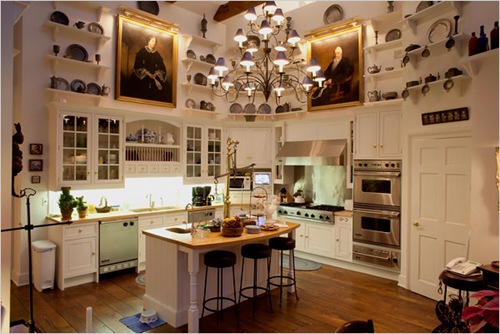
This is one of my all time favorite kitchen images ! I love the chandelier, the paintings and the kitchen dishes displayed on the walls.

34Sorry don’t know the image source.

38 Image source Den Stal

Again chandeliers hanging in pair. Isn’t that chic? The contrast between the black cristal chandeliers and the white kitchen is so beautiful.

27 Sorry don’t know the image source.

21 Image source A Room For Everyone

And again!

32 Sorry don’t know the image source.

11 Image source Kvänum

A contemporary styled chandelier .

___

To end this post I’ll give you here some company addresses of which I am sure that you will find your favorite kitchen island fixture.

Lighting company addresses :

EMPEL COLLECTIONS www.empelcollections.com; TEKNA www.tekna.be; CHARLES EDWARDS www.charlesedwards.com; VAUGHAN www.vaughandesigns.com; SHADES OF LIGHT www.shadesoflight.com

I wish you a wonderful week!

xx

Signature

Sorry for the unknown image sources. If anyone of you knows the source, please let me know!