Showing posts with label Orangery. Show all posts

Saturday, September 24, 2011

What a surprise!!!


I was so surprised, but oh so pleased when my friend Céline, of the French blog Céline Chollet Aquarelles, emailed me that she had a surprise for me and that I had to visit her blog to discover what the surprise was!

Céline had to make some aquarels for a new exhibition in the Musée d'Art Naïf de Noyers-sur-Serein (http://www.noyers-et-tourisme.com) and she decided to make an aquarel of my orangery because the warm color palette and the sober character of the Belgian interiors inspired her, she told on her blog.

Can you imagine how surprised I was landing at her blogpage and discovering this most beautiful aquarel of my orangery?!!


Can you believe Céline realised her aquarel using only a few pictures of my orangery of which I posted some pictures once?!

Here you see  some of the pictures Céline had filed on her computer.foto's 044 

foto's 043

foto's 015

Céline behind her desk, working at the aquarel of my orangery.


And this is the finished aquarel of our orangery!!!Orangery aquarelle Isn’t it amazing??!! I just love it!!


To read Céline’s post about the aquarel, click on logo of Céline Chollet Aquarelles. Céline Chollet Aquarelles

If you don’t know Céline yet, you really should visit Céline’s beautiful blog and discover her most amazing aquarels at http://wwwboitedaquarelles.blogspot.com/

So I am a lucky person to have a friend as Céline! And I do hope to meet her in person one day!!

THANK YOU SO MUCH CELINE !!! You are a wonderful friend!


Wish you all a wonderful and happy weekend!

xx

Signature

Thursday, March 31, 2011

Orangery redo – Final version


I am pleased to share with you today the pictures of the finishing part of our orangery-redo. The pictures are taken by me with a cybershot Sony camera, so forgive me for my unprofessional photographie.

Enjoy!

foto's 052


foto's 058


foto's 054

Coffee table executed by our company Lefèvre Interiors.


foto's 056

The existing sofa is slipcovered with the identical linen as the upholstery of the new large sofa opposite.

BeforeBefore2Photo credit : Fotografie Claude Smekens

foto's 043

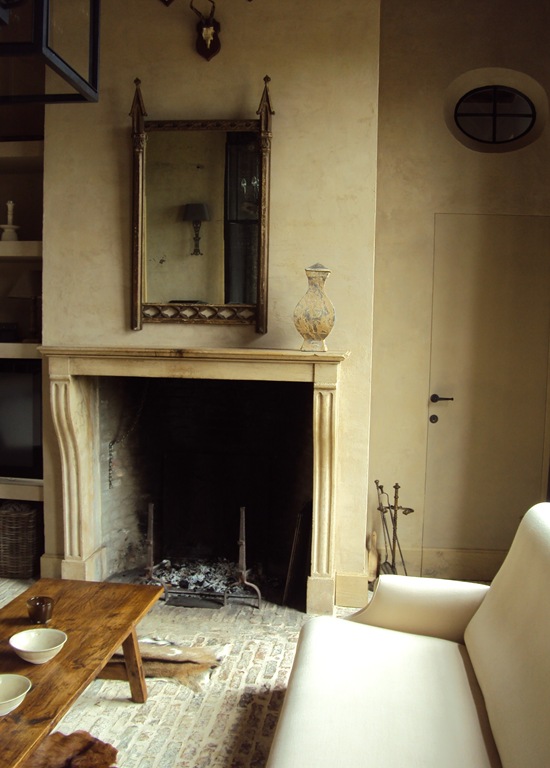
The color of the lime paint is much warmer than the flat cool grey painted walls before.

BeforeBefore3 Photo credit : Fotografie Claude Smekens


2011-03-31_151136

At the upper part of the chimney mantelpiece we hung a group of antlers.


foto's 011

To obtain a more straight and clean look, I have chosen for a fixed upholstered large sofa.


foto's 012 


foto's

This will be my new reading corner!

BeforeIMG_6738Photo credit : Efi De Grande

foto's 046

I just love the color of my antique vase I placed on the chimney piece.


foto's 049


foto's 035


foto's 039


The orangery is much warmer, lighter, much airier and more peaceful than before. Aren’t you agree?

For my readers who have missed the orangery-redo in progress and who are interested in reading about it, click here, here and here.


Custom made furniture;  seating & decoration : Lefèvre Interiors

Linen fabrics : Libeco

Painting : Dankers Decor

___

I am curious about your thoughts!

xx

Signature

Thursday, March 24, 2011

Orangery redo – Part III & Gardening Belgian Style at Providence Ltd.


First of all a huge thank to my friend Mona of the beautiful blog PROVIDENCE LTD. for posting an interview with me about the Belgian style of gardening! Mona has put a lot of work in this post! Thank you so much Mona for asking me to talk about this subject! I really feel honoured!

2011-03-24_153708

If you are interested in this interview, please click on the Providence Ltd. logo.  header_new8

Our garden Our garden (picture of last year).

___


ORANGERY REDO - PART III

Today a quick post about the process of our orangery redo. For those who haven’t read Part I & II and want to know more about it, please click here (Part I) and here (Part II).

Part II ended with the plaster coat.

1_thumb[1]

The painters started to paint the plaster coat a first time, as you can see here.

1


And the day after it looked as this.

4

After our painter R. had made us some samples to be able to choose the right finishing patina…

2


…he moved on with the finishing and of course the most important part!!

The application of the final and definitive patina!!!

8


Our lovely painter, B. was giving the lightswitches and plates the suitable paint color.

Foto 9


A final check up with the chosen upholstery fabrics.

foto's 005


And here you can see the result! Jan and me are really excited about it!

foto's 013

We are really happy with the patina that matches, in an excellent way, the stone of our chimney piece.


foto's 011


A huge thank to the painters R. and B. for their incredible effort to finish our orangery room according our wishes! 

Thank you guys, you are the best! You can be very proud of your job!


foto's 001

The orangery is awaiting to be furnished!

TO BE CONTINUED…

xx

Signature

Wednesday, March 16, 2011

Orangery redo – Part II


For those who are interested, I love to give you a quick update about our orangery redo. (To read part I of the orangery-redo, click here.)

This weekend we prepared the orangery in order to start painting on Monday.

2011-03-16_094209Shelves before

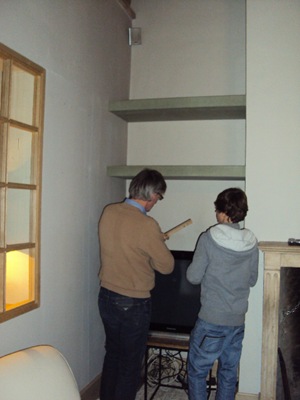
As I wanted the shelves to have a more solid look, Jan made us new shelves and Anthony was assisting Jan to install the new ones.

foto's 010

foto's 012Shelves after


2011-03-16_102918 Ralph has his thoughts about the redo of HIS bedroom!

Monday

On Monday morning the painters arrived and started to give the walls a first coating.

14

15

At the end of the day the first coating was finished and it looks as this. A very light-colored layer.

Tuesday

2After having mixed several materials, the painter started to give the walls a coat of plaster. And I was chocked!!! It looked SOOO dark!!! And I wanted to have the walls to look more or less as the color shades of my Syrian vase!!

foto's 006_thumb[1]

But he assured me that it would be totaly dried up the next morning! And besides, it was only a first plaster coat he had to start with and that definitely is required to bring on the next layers to end up with the limewash finish.

1

And indeed! This morning it looks as this (picture above)!

So this is the Italian plasterwork that is seen on the walls of old Italian houses.

Today (Wednesday)

7 This morning the painters are finishing the plasterwerk. You can see the difference in color of the already plastered wall (windows) and the part above the chimney piece that isn’t plastered yet.

I am so curious about the paint layers which have to be brought on this plasterwork in the next coming days…! At that point we will have to decide about the final shade of color!


I might presume that finally it will looks more or less as the wall on the picture here below.

chateau en el sur de francia Deleuze  (6) image source : here

It all made me thinking of the colors of these Venetian houses.

Venetiësource : unknown

And Italian plastered walls as on these pictures.

Italiësource : unknown

TSimage source : here

sardinia_luxury_hotel12 image source : here

2011-03-16_100728 Axel Vervoordt   image source Architectural Digest  photo credit Mario Ciampi


2011-03-16_111336AD cover issue April 2011

The cover of the April issue of Architectural Digest looks very promising! The plaster technique on the walls looks gorgeous!

I will share more of the redo in a later post! I hope you liked this orangery-redo story so far?


If you want to know more about the Belgian paint company at work here, please email me at greetlefevre@hotmail.com.


xx

Signature